Cleaning from fungus: SMC Pentax-M 50 f/1.7
Going on with the lens rescue series, an SMC Pentax-M 50/1.7, one of the best Pentax lenses, is the new patient.
As you can see here, back-lighted by a LED flashlight, a fungus has widely infected the lens.

Since the fungus will reveal to have infected all the elements in the lens, a fully elements removal is required. As usual, before going on, the classic legalese disclaimer:
AS USUAL, I CANNOT BE HELD RESPONSIBLE IF YOU DESTROY YOUR LENS DOING WHAT I EXPLAIN HERE. IT WORKED FOR ME, IT DOESN'T MEAN THAT IT WILL WORK FOR YOU. THIS IS A VALUABLE LENS, THUS CONSIDER THE SERVICES OF A PROFESSIONAL REPAIRMAN BEFORE TRYING TO FIX IT ...
What you will need to proceed:
- A sink cap, to remove the front name ring.
- A spanner wrench (got mine from MFLenses). You can get yours wherever you want, but avoid cheap ones (less than 50€).
- Cold cream. I use Avene's one, but simply because it is really cheap in France. Ask to your beauty-shop (or to your wife) what they have available.
- Zippo fluid or isopropyl alcohol or something similar, to remove the cold cream from the lens.
- Optical cleaning fluid for the final cleaning of the lens.
- A microfiber cloth, to clean the lens.
- A clean workplace and ... some patience ;-) ...
Now, let's start the game ;-) ...
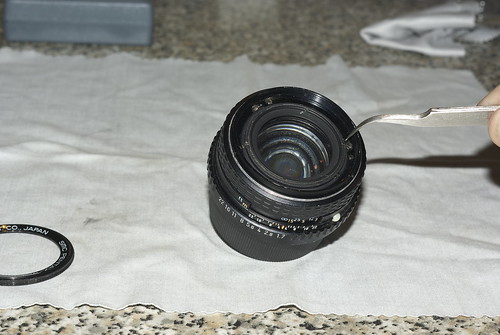
Focus the lens to the infinity first, for easy removal of the rear optical group, then unscrew the front name ring and remove it.

Notice here the two concentric retaining rings with notches for a spanner wrench exposed.

Engage the outer one with the spanner wrench and unscrew the whole front optical group.

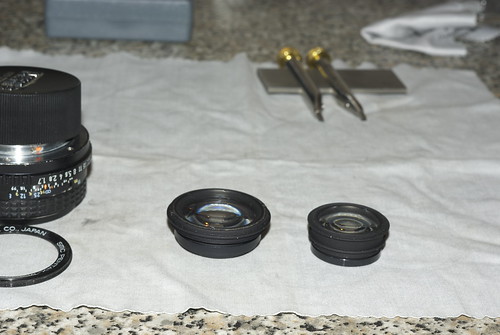
Reverse the lens. You will notice here too two concentric retaining rings with notches for a spanner wrench. And here too, engage the outer one with the spanner wrench and unscrew the whole rear optical group.

Let's start with the front cell. Unscrew the retaining ring of the front element.

Notice the inner retaining ring exposed. Engage it with the spanner wrench and remove the second element of the front optical group.

Unscrew the retaining ring of the rearmost element and remove the lens from the rear optical group.

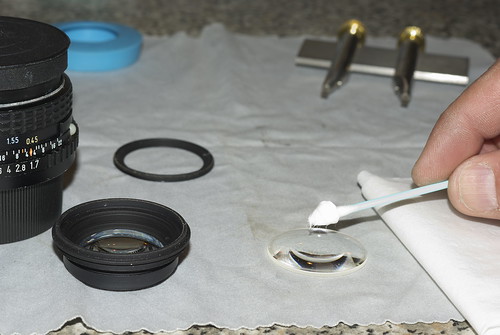
Now you have separated all the five elements of the lens. Using a Q-tip (or the like), spread some cold cream on the lenses.

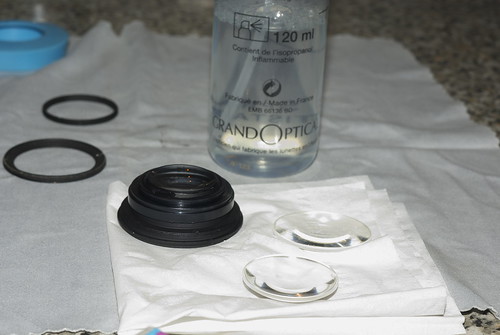
After about an hour, remove the dried cold cream with either Zippo fluid or isopropyl alcohol (i had the last one available).

Then, clean the lenses with some optical fluid.

Almost done. Rebuild both the front and the rear optical cells and screw them back in the barrel. Last, screw in the front name ring.


Time to enjoy the freshly cleaned SMC Pentax-M 50 f/1.7. A picture of the lens that has been used to take the previous pictures and a portion of the surgical team.

That's all, folks!
Hoping that this will be useful to someone ...
Labels: Pentax K10D, Repair


11 Comments:
Great tutorial, nice to see the MFLenses wrench being used so well.
Jes.
Thanks Jes ... Nevertheless, i must confess i would have liked to be forced to use it less often ...
But the nice side of the story, is that the lens now is ready for its next shooting assignment ;-) ...
Great tutorial indeed. I have bought 4 M42 lenses in the past days, some of these will need a heavy cleaning.
2 takumar 50 F/1.4, 1 takumar 55mm F/2 and a Carl Zeiss Jena Sonnar 135mm f/3.5 I will certainly follow some of your advices here. Thank you!
Hi Serge, at first, thanks for the kind words.
Then, you have a nice set of lenses ... The Takumar 50/1.4 are between the best 1.4 lenses, on both APS-C and FF cameras, and the 55/2 as well as the Sonnar 135/3.5 are really fine (i too, i have them) ...
Best wishes for your cleanings and let me know how it evolves ...
Hi,
first at all thanks for your posts. All interesting and amazing.
I want make you a questing not related with this lens but with another one: Micro Nikkor 200 1:4. Recently I have purchased one with a little amount of fungus in the front lens (I know it before buy the lens).
My doubt is how to remove the front ring, because there is a small screw in the barrel. Do you have some information about how remove the front ring and access to the front lens to clean it?
Thanks in advance for your attention and so sorry for my english.
Best regards
Hi,
At first, thanks for spending your time here and commenting ... And your english is very good ...
For what concerns the Micro Nikkor 200/4, i have never serviced it. But usually, the front name ring unscrews exactly as on the other lenses i have serviced. The screws on the barrel *should not* be removed, because they are *probably* used to keep in place the outer barrel ...
I'm sorry for not being of too much help ... Do you have some pictures of the lens (front and side views) so that i can take a look ? A picture of the screws on the barrel would be useful too ...
Cheers
Hi,
thanks a lot for your answer and sorry for the delay, but I am in a travel and last week I have broken my glasses and it was very difficut to me take shoots.
I send to you some photos to show you the problem. As you can see the lens has a built in lens hood and there is an screw in the lens barrel (similar to the screw in the 6x7 105 Takumar you have cleaned). I have sent an email to Nikon asking for a parts manual, but I don't know if Nikon will send it to me (really it is a very old lens).
Sorry, how can I send to you the photos?
Thanks again for your time.
César
Hi César,
Sorry for the late reply, i'm just back home from holidays ...
Yoiu can send the pictures of the lens at nk6680 [at] gmail [dot] com ...
Cheers
It is so interesting photograph and informative for taking photos.
Thanks for commenting, summerhathway ...
a very nice tutorial, but I don't know were to buy the tool to unpack the lenses
Post a Comment